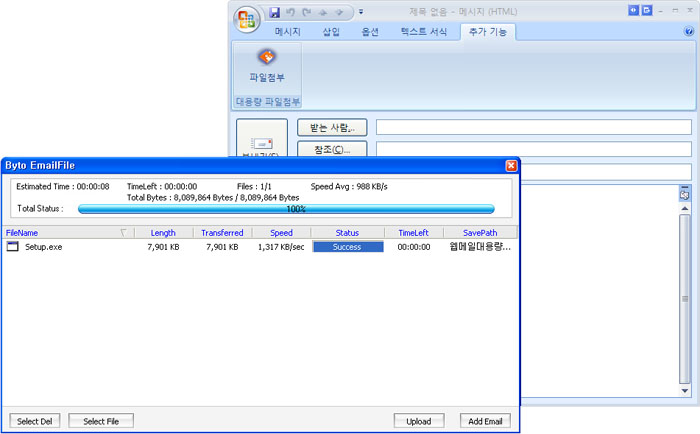
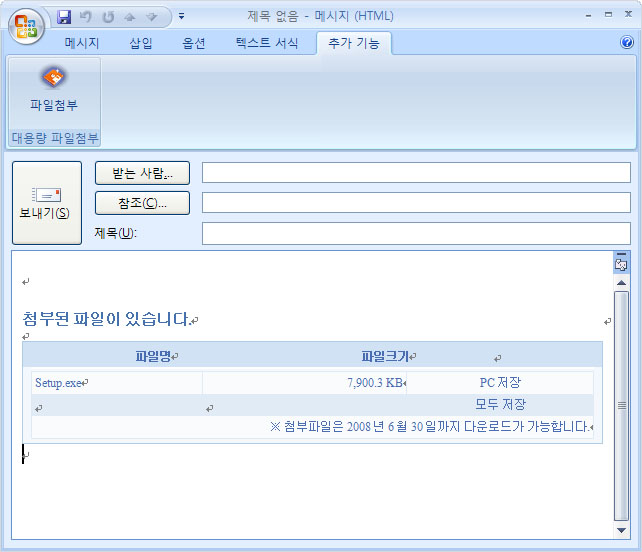
Microsoft Office 2007 연동

사용자 삽입 이미지


사용자 삽입 이미지


개발 개요
  -  Microsoft Office 2007 Outlook용 대용량 파일 첨부 기능 구현

개발 필수 자료
 - Microsoft Visual Studio 2005
 - Microsoft Visual Studio 2005 Tools for the 2007 Microsoft Office System
[다운로드]
 - Microsoft Office 2007

개발 참고 사이트 :
 -
MSDN Visual Studio Tools for Office

참고사항
 - 설치 프로젝트의 "필수 구성 요소"에 2007 Microsoft Office Primary Interop Assemblies 및
   VSTO 등록하기
   참고 사이트 :
http://blogs.msdn.com/vsto/archive/200 ··· lee.aspx


  1.  Download the
OfficeVSTO2005SEWindowsInstallerV3.msi sample
     
Deploying Visual Studio 2005 Tools for Office Second Edition Solutions Using Windows Installer (Part 1 of  2)

  2.  OfficeVSTO2005SEWindowsInstallerV3.msi 설치

  3.  %ProgramFiles%\Microsoft Visual Studio 2005 Tools for Office SE Resources\
         VSTO2005SE Windows Installer Sample Version 3\packages
      폴더의 내용을
      %ProgramFiles%\Microsoft SDKs\Windows\v6.0A\Bootstrapper\Packages 에 복사

  4. component checker 컴파일 하기
       a) Open a Visual Studio command prompt
       b) Change directories to
          %ProgramFiles%\Microsoft Visual Studio 2005 Tools for Office SE Resources
              \VSTO2005SE Windows Installer Sample Version 3\projects\Checks
       c) Type the following command: cl.exe /Oxs /MT /GS ComponentCheck.cpp advapi32.lib
       d) Copy ComponentCheck.exe to the
          %ProgramFiles%\Microsoft SDKs\Windows\v6.0A\Bootstrapper\Packages\Office2007PIA
          folder and the
          %ProgramFiles%\Microsoft SDKs\Windows\v6.0A\Bootstrapper\Packages\Office2003PIA folder.

  5. Download and extract the Office 2007 PIAs from
       2007 Microsoft Office System Update: Redistributable Primary Interop Assemblies.

  6. Copy the o2007pia.msi file to the
     %ProgramFiles%\Microsoft SDKs\Windows\v6.0A\Bootstrapper\Packages\Office2007PIA folder.


 - 배포시 필수 설치 패키지
  
Microsoft Visual Studio 2005 Tools for Office Second Edition Runtime
   Microsoft Visual Studio 2005 Tools for the Microsoft Office System(VSTO2005) 언어 패키지 :
   2007 Microsoft Office Primary Interop Assemblies
 

2008/06/04 03:16 2008/06/04 03:16
글 걸기 주소 : 이 글에는 트랙백을 보낼 수 없습니다

[shell] ps 명령어 사용법

ps [-option]

[사용예]
    $ ps -ef
    $ ps -aux | grep httpd
   
[option]
    -a    : 모든 프로세스를 나열
    -c    : 해당 프로세스를 유발시킨 명령어 이름을 task struct에 참조한다.
    -e    : 해당 프로세스에 관련된 환경변수 정보를 함께 출력
    -f    : 프로세스 간 상속관계를 트리 구조를 보여줌
    -h    : 메뉴는 보여주지 않음. (PID, TTY, STAT, TIME, COMMAND 등)
    -j    : 작업에 관련된 ID를 출력
    -l    : j보다 자세하게 정보를 출력
    -u    : 사용자 이름과 프로세스가 시작된 시간을 출력
    -x    : 터미널에 종속되지 않는 프로세스들을 출력
    -n    : 사용자 정보를 ID와 숫자로 표시
    -w    : 출력 결과를 생략하지 않고 출력

[출력 항목]
    PID     : 프로세스 식별번호
    TTY     : 프로세스와 연결된 터미널 포트
    STAT    : 프로세스 상태
                R  실행 중 혹은 실행될 수 있는 상태
                S  sleep
                I  idle (비활동 상태:BSD, 중간적 상태:sys V)
                T  정지된 상태(suspend)
                Z  좀비(zombie) 프로세스
                D  디스크 관련 대기 상태
                P  페이지 관련 대기 상태
                X  메모리 확보를 위해 대기중(sys V)
                K  사용 가능한 커널 프로세스(aix)
                W  스왑 out된 상태
                N  nice되어진 상태
                >  우선 순위가 인위적으로 높아진 상태
    START   : 프로세스가 시작된 시간
    TIME    : 총 CPU 사용 시간
    USER    : 사용자의 이름
    COMMAND : 사용자가 실행한 명령어
    UID     : 사용자의 ID
    PGID    : 사용자 부모 프로세스의 그룹 ID
    SID     : 세션 ID
    PRI     : 실행하는 우선 순위에 따른 프로세스
    NI      : nice에 의한 우선 순위에 따른 프로세스
    RSS     : 실제 메모리 사용량
    SZ      : 프로세스가 사용하는 자료와 스택의 크기
    SHRD    : 프로세스가 사용하는 공유 메모리
    %CPU    : 프로세스가 사용하는 CPU 점유율
    %MEM    : 프로세스가 사용하고 있는 메모리 점유율
    WCHAN   : 프로세스가 실행하고 있는 커널 루틴
    VSZ     : 가상메모리 크기

2008/04/10 12:34 2008/04/10 12:34
태그 : , ,
글 걸기 주소 : 이 글에는 트랙백을 보낼 수 없습니다

GDI+에서 Round Rectangle 그리기.

void GetRoundedRect(GraphicsPath* pPath, RectF baseRect, float radius){
    if( radius<=0.0F ){ 
        pPath->AddRectangle(baseRect); 
        pPath->CloseFigure(); 
        return;
    }
    if( radius>=(min(baseRect.Width, baseRect.Height))/2.0){
        GetCapsule(pPath, baseRect); 
        return;
    }
    float diameter = radius * 2.0F; 
    RectF arc   ( baseRect.X, baseRect.Y, diameter, diameter); 
    pPath->AddArc( arc, 180, 90 ); 
    arc.X = baseRect.GetRight() -diameter; 
    pPath->AddArc( arc, 270, 90 ); 
    arc.Y = baseRect.GetBottom() -diameter; 
    pPath->AddArc( arc, 0, 90 ); 
    arc.X = baseRect.GetLeft();
    pPath->AddArc( arc, 90, 90 );     
    pPath->CloseFigure(); 
}

void GetCapsule(GraphicsPath* pPath, RectF baseRect){ 
    float diameter; 
   
    TRY{ 
        if( baseRect.Width > baseRect.Height){ 
            diameter = baseRect.Height;            
            RectF arc( baseRect.X, baseRect.Y, diameter, diameter); 
            pPath->AddArc( arc, 90, 180); 
            arc.X = baseRect.GetRight()-diameter; 
            pPath->AddArc( arc, 270, 180); 
        }else if( baseRect.Width < baseRect.Height ){ 
            diameter = baseRect.Width;
            
            RectF arc( baseRect.X, baseRect.Y, diameter, diameter ); 
            pPath->AddArc( arc, 180, 180 ); 
            arc.Y = baseRect.GetBottom() -diameter; 
            pPath->AddArc( arc, 0, 180 ); 
        }else{ 
            pPath->AddEllipse( baseRect ); 
        }
    }CATCH(CException, ex){
        pPath->AddEllipse( baseRect ); 
    }
    END_CATCH
    pPath->CloseFigure(); 
}
사용 예)
RectF PaintRect(WndRect.Width()/2-200, WndRect.Height()/2-100, 400, 200);

LinearGradientBrush BackBrush(PaintRect , Color(255,255,255), Color(57,109,194), LinearGradientModeVertical);
Pen     BackPen  (Color(57,109,194), 3);

GraphicsPath RoundPath;
GetRoundedRect(&RoundPath, PaintRect, 10);

pMemG->FillPath(&BackBrush, &RoundPath);
pMemG->DrawPath(&BackPen,   &RoundPath);

자료 참고: codeproject.com

2008/03/14 19:00 2008/03/14 19:00
태그 : ,
글 걸기 주소 : 이 글에는 트랙백을 보낼 수 없습니다